
Set up user registration/login using MongoDB. Modify Laravel’s default user model to work with MongoDB. Store sessions and tokens in MongoDB.
Thank you very much for joining me for this tutorial, where you’ll learn how to set up user authentication for Laravel and MongoDB. We start by setting up a local development environment, going over some changes to the files, and finally, having a complete basic authentication running with MongoDB.
Setting up the environment
Laravel is a PHP web framework, which makes it easy to build standardised web applications. In this tutorial, we set up PHP, Laravel, and MongoDB on macOS.
We start off by installing PHP, Composer, and the Laravel Installer with the following terminal commands:
This bash script is going to extend your PATH environment variable with the path to all necessary commands. If you see an error like this…
…you might want to do this manually. In my case, I’m using the fish shell, so it is done with this command:
Just make sure all necessary commands are working by executing:
The output should give you the loaded configuration file for PHP. If this points to your path extension from above, you’re good to go!
Let’s go quickly through the versions I used in this tutorial:
All the commands above should work and give you roughly the same versions I used.
To compile Laravel’s frontend assets, you need either Node and NPM or Bun. Please follow the official instructions on how to install these:
Creating the Laravel application
Now that the development environment is set up, we use the Laravel Installer to create our Laravel application skeleton. Please change the directory to where you want the application to be created and execute:
Answer the questions like this:
Now that the application skeleton is created and all frontend dependencies are installed and built, let’s change to the application directory and have a look:
The application directory structure should look like this:
Start your Laravel application with composer run dev.
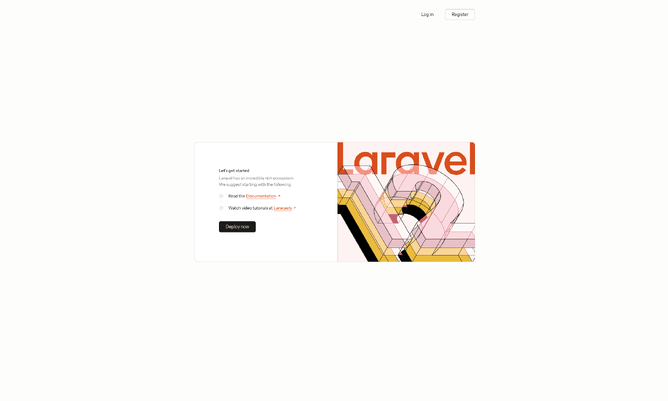
Now, point your browser to http://localhost:8000/ and you’ll see your Laravel application. It should look like this:
It’s time to set up MongoDB.
Setting up a local MongoDB database
MongoDB is a document-oriented database, developed by MongoDB Inc. It was released in February 2009 and has gained massive popularity since—not just because of its schemaless design, which makes development and software iterations fast, but its powerful MongoDB query language.
MongoDB can easily be deployed as a standalone or in a replica set with three nodes. Horizontal scaling is done by a process called sharding.
Let’s get MongoDB up and running locally.
The easiest and best maintained way to install MongoDB on macOS is homebrew, I find. Homebrew is the missing package manager for macOS. If you lack Homebrew, please install it via the official website and documentation.
Homebrew offers formulae for all major MongoDB versions, starting with version 4.4. In case you want only the latest release, use the mongodb/brew/mongodb-community formula. Otherwise, go with mongodb/brew/mongodb-community@8.0. At time of writing, mongodb/brew/mongodb-community installs MongoDB version 8.2.0.
There are formulae for the MongoDB shell, and database tools as well. These are installed automatically as dependencies to mongodb/brew/mongodb-community.
Install MongoDB now:
After you’ve installed MongoDB, you can either start MongoDB as a service with…
…or run it in a terminal window with:
I’ve done this tutorial on my MacBook Pro with Apple Silicon, but my initial Homebrew setup is many years old. It might be that your path starts with /opt/homebrew. Please check your installation.
PRO-TIP: Change your MongoDB config file, and comment out the systemLog section:
This shows you all MongoDB logs directly in the terminal. I use iTerm2 and added a MongoDB profile with the above command. Now, if I quickly need to spin up MongoDB, I start the profile, a new terminal tab appears, and I can see everything that is going on with MongoDB.
Connecting your Laravel application to MongoDB
Now that you’ve got a Laravel application and MongoDB running, let’s connect them. First, install the Laravel MongoDB package with the following command:
The laravel-mongodb package is officially maintained by MongoDB, and while MongoDB is natively supported by PHP through the MongoDB Driver, the Laravel MongoDB package provides a richer integration with Eloquent and other Laravel features.
Should you get problems with version mismatch of dependencies, add something like --ignore-platform-req=ext-mongodb to the above command.
Add your MongoDB connection string and database name to the .env file:
Register the database connection in config/database.php:
Change [connections][database][driver] from “database” to “mongodb” in config/queue.php.
Register the cache store in config/cache.php like so:
And finally, add the MongoDB Service Provider to bootstrap/providers.php:
Because we started with SQLite during the creation of our Laravel application earlier, all default tables were created in that database. Therefore, it is worthwhile at that point in time to create them in MongoDB, as well. Execute this command to do so:
Congratulations! Your Laravel application uses MongoDB now.
NOTE: Should you get a duplicate key error while trying to log in, use the MongoDB shell or MongoDB Compass to remove the “key_1” index on the “cache” collection. The Laravel MongoDB integration uses the “_id” field as the key field.
Same for the “id_1” index on the “sessions” collection.
User authentication with MongoDB
Laravel comes with user authentication out of the box, but the scope of existing components varies depending on the Starter Kit you choose during the creation of the application. Do you remember? We chose the React Starter Kit. This means that we’ve got not just the necessary backend components but all frontend components, like login, signup, and “forgot password” forms, as well.
Laravel’s default database is SQLite. Therefore, all authentication functions work with that database out of the box. Let’s change that to MongoDB.
Install the official Laravel MongoDB client library
This was done in the previous step already, by installing the mongodb/laravel-mongodb package.
Modify the Laravel user model
Now that we run on MongoDB, we want to change the built-in user model accordingly:
Navigate to app/Models/User.php and change "use IlluminateFoundationAuthUser as Authenticatable;” to “use MongoDBLaravelAuthUser as Authenticatable;”.
That’s really all you need to do to switch Laravel user authentication to MongoDB. Please open your browser to http://localhost:8000/ and register a new user account. This user should be stored in the “users” collection of your local MongoDB instance.
Create the auth controller
We started this little tutorial on Laravel React Starter Kit, which means that we’re set without creating a separate user controller. The login is handled by app/Http/Controllers/Auth/AuthenticatedSessionController.php::store(), and logout by app/Http/Controllers/Auth/AuthenticatedSessionController.php::destroy().
The public and restricted routes are handled by “guest” and “auth” route groups in routes/auth.php. Have a look to understand the concept better.
Should you ever want to implement a user controller yourself, you’ll find a barebones one in the MongoDB documentation.
Password reminders via MongoDB
Password reminders work out of the box if you’ve made all the changes described in this tutorial and given that you use roughly the same versions as I did.
HTTP sessions with MongoDB
Laravel gives you many options when it comes to where to store your user sessions. You can store them into the filesystem, cookies, database, redis, memcached, and many more.
Configure MongoDB as the session driver
Same as with password reminders, when following this tutorial precisely, all HTTP sessions should be stored in MongoDB automatically. The collection is called “sessions”.
Laravel removes expired sessions automatically after 120 minutes through some kind of garbage collector. Nevertheless, should you want more control over HTTP sessions in MongoDB, please add the MongoDB session driver.
PRO-TIP: Use a MongoDB time-to-live (TTL) index on your sessions and let MongoDB handle the garbage collection and not PHP.
You can implement this by changing your config/session.php to:
Add a TTL index on time like so:
Conclusion and takeaways
The popular PHP web framework Laravel can be used with MongoDB. Thanks to the official Laravel integration for MongoDB, implementing user authentication is a breeze.
Follow this tutorial closely and your Laravel application, whether a new or existing one, will use MongoDB in no time for your user data, password reset tokens, and HTTP sessions.
Please keep in mind that relying on an ORM of any kind might affect your non-relational database performance in a negative way.
